Life
11 Pumpkin Carving Hacks For Every Skill Level
I am a dyed-in-the-wool, witch hat wearing, Snickers bar hoarding, Halloween freak. I'm basically a creature of the night at this point in the year and I'll make no apologies for it. If my kids are a little tired of Hocus Pocus, they can deal with it. (After all, I watched Caillou with them as toddlers, and I'll never get those hours back.) One of my all-time favorite activities is making Jack-O-Lanterns. It lets me be both stabby and artistic at the same time. What could be better? So for your benefit, here are my top 10 pumpkin carving hacks to make your squash a little more gourd-geous.
The main thing you want to consider when you're carving a pumpkin is if you're doing it alone or if you expect your kids to help you out. If it's the latter, you might want to consider how you can make it a full experience for them without necessarily doing any of the cutting. You can have them pick the pumpkin, do the scooping, and even draw the stencil onto the skin, but until they're old enough not to cut off a thumb in the process, that's where their involvement will end. You might also consider painting your pumpkins as opposed to carving them. Acrylic and tempera paints work best on the smooth skin of the holiday squash. As for a full Jack-O-Lantern, make sure your tools are sharp, and your hand is steady.
1Get A Slice-Proof Glove

Mistakes happen. Slips happen. That doesn't mean you need to end up like the agent in The Shape of Water who lost two fingers to a sad sea creature. These gloves aren't perfect and they can make minute actions more difficult, but they're pretty effective at saving your digits.
2Consider A Rotary Tool
Some rotary tools are prohibitively expensive, but you can find a decent set for under $40 and you'll get plenty of use out of it year after year. It's also good for sanding small spaces, cleaning, buffing, and other applications you never knew you needed it for. The fine tips and steel-pointed sanders are great for the detail work, and for when you want to shave some meat off the side without going all the way through the wall of the pumpkin.
You'll also need an exacto knife, sharp pumpkin scraper, and a serrated blade. Other tools commonly used for carving clay can also be great to have on-hand.
3Stencils Are Your Friend
There are hundreds of free pumpkin carving patterns available for download. Websites like The Pumpkin Lady specialize in producing high quality content for families everywhere, and they range in difficulty from a simple smile to elaborate celebrity renderings.
4Your Pumpkin Should Be Super Hard & Super Heavy
The harder it is, the fresher it is, and it should be heavy for its size. That indicates a thick wall inside the pumpkin, and it will last longer. Trust me, the lighter ones might be easier to carry, but they're not your friend when it's time to carve.
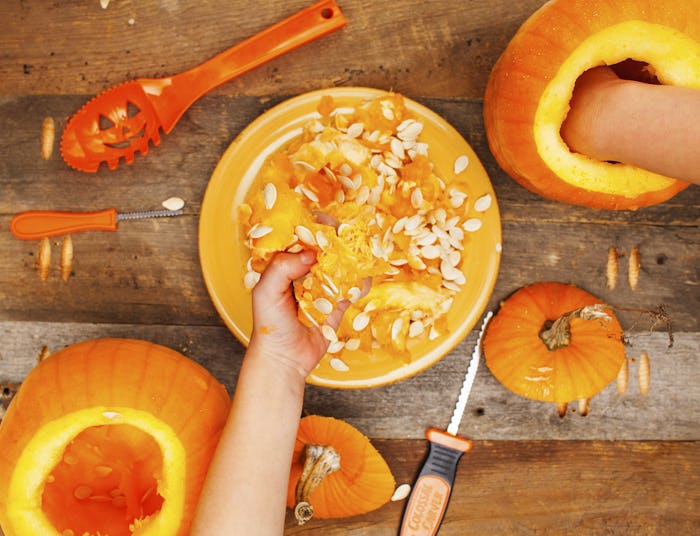
5Get All The Guts Out & *Fully* Scrape The Sides
The guts make it rot faster. Get out all the innards, and really make sure the sides are scraped down without leaving any of the stringy bits.
Also, while most of us cut around the stem, I find it's better to cut a portion out of the bottom, on an angle, so that you can easily light the votive by lifting the pumpkin, not sticking your hand in its guts.
6Spray The Inside With Bleach & Water
Mix a tablespoon of bleach into a quart of water and spray the inside of the pumpkin and in the crevices that have been cut. You'll find recipes like this all over the internet, but this is the one my MawMaw used, and I haven't had a problem.
7Wait To Carve It
No matter the precautions you take, pumpkins will rot once they're cut. If it's really cold out, it won't happen as fast, but generally, you've got a week. It's hard to wait, but if you carve it too soon, your Jack-O-Lantern will sag and look sad by Halloween.
8A Frozen Pumpkin Will Be A Mush Pumpkin
Where I grew up in northeast Ohio, Halloweens can get downright frigid, and everyone can tell you that as soon as your pumpkin freezes, it's all over. The second the mercury goes back above 40, you've got a soupy mess on your porch. The Smithsonian magazine says that between 50 and 60 degrees is the best, and below that you should consider bringing it indoors.
9Drill A Hole At The Top
Make a chimney in your pumpkin by drilling a hole off-center at the top. It doesn't have to be huge, just under an inch in diameter. It will let smoke escape, which can do serious damage to a pumpkin.
10Carve The Pumpkin At Eye Level
For the detail work, you want to be close to the pumpkin. I find this is best when I prop the pumpkin onto some old towels on the floor, and sit with it between my legs. It allows me total control over the carving, and really lets me feel what I'm doing.
11Use Scraps Wisely — And To Fix Mistakes
The scraps can be used as eyeballs, a tongue, a jaunty hat — the options are limitless. Plus if you take too much out of one area, you can carve the scraps to fit back in and attach it with toothpicks. It's pretty genius.
Don't get too bogged down by carving if you don't love it. You can just drill in holes all over it, call it modern, and it will still glow gorgeously. I happen to love carving, but not everyone does. Also, you can just buy artificial, pre-carved pumpkins and call it good.

