Life
I Tried 5 Hair Care Hacks To Keep My Dye From Fading, & Here’s What Worked
For anyone who knows the rush you experience after getting your hair colored, you’re probably also familiar with how quickly both the color and that feeling can fade. Celebs like Katy Perry, Kesha, Kelly Osbourne, and even Kelly Ripa have all been showing off some pretty interesting shades lately, so it comes as no surprise that colored hair is en vogue. From colombre to the opal trend to granny hair, the colors of the rainbow (and then some) are having a major moment.
Coloring your hair an unnatural hue can be more complicated than doing a natural color, but the concerns are usually the same: You want your color to last as long as possible, and you want your hair to feel healthy. It’s been ages since my own was virgin, and I can’t entirely remember what my natural color is, but I don’t regret taking the leap into the world of color. I’ll readily admit that keeping up with a glossed, colored, and highlighted head isn’t exactly cost effective, though. Boxed dyes are impractical, too, since they rinse out in a couple of days, and professional salon coloring results in a hefty bill and frequent touch-up appointments.
Let your hair go too long, and you’ve got to the start the whole process over again. Can you say, #blessed?
The Experiment
In order to find tips and tricks that actually worked, I scoured the internet and asked my hairstylist for the best DIY treatments. Not only did I want to keep my mermaid-inspired ‘do looking and feeling fresh, I was on the prowl to keep my wallet feeling full and satisfied as well. I tried out the top five remedies (without styling), so you don’t have to. I know, I know. You’re welcome.
1. Cold Shower

No, I’m not talking about what you need to take after watching a shirtless Eric on True Blood. According to Pravana hairstylist Tiffany Sposato, “Washing your hair in lukewarm water, then conditioning with the water as cold as you can stand it, closes the hair’s cuticles.” That means the color is more likely to stay in place versus a hot shower, where the hair opens and lets the color bleed.
I tried convincing myself that the cold temperature might be refreshing and that it was my duty as a writer to do this. But as soon as the water hit my skin, I was shivering. I even attempted some yoga moves so the water would only hit my head instead of my body. A bit of a fail there, in case you’re surprised. The biggest win was when I looked down and noticed there was hardly any color in the water pooled by my feet! It may suck to get a little chilly, but avoiding any unnecessary color loss is worth it to me. Plus, I didn’t drip color after I got out of the shower and my hair even seemed a bit shinier.

2. Not Your Mom’s Hot Oil Treatment

First cold showers and now hot oil? I promise I’m not making this intentionally sexy. But if you ask your mom or grandma about hot oil treatments, they’ll immediately know you’re talking about a timeless hair remedy. When I asked my own about at-home treatments for hair, she reminded me that “back in the day” pretty much all upkeep and maintenance was done at home. Since not everyone will have Alberto VO5 in their bathroom, I looked for a DIY alternative.
Alberto VO5, $9, Amazon
I found a pretty simple one that uses only olive oil and a blow dryer. With clean, dry hair, I worked in the oil ’til it was saturated but not dripping. My hairstylist suggested I put on a shower cap or use cling wrap to get the most out of the treatment. I used the blow dryer on my wrapped ‘do and left in the oil for an hour. After gently washing in cool water with mild shampoo, I definitely felt like it was softer. The only downside was that it seemed a little heavy. Perhaps I wasn’t aggressive enough in washing it out, but I didn’t want to risk damaging my hair further by overdoing it either. It’s a great option for a once-a-month type treatment, but not an every week thing.

3. Don't Towel Dry

Usually, I just throw my hair in a Turbie Twist and get some work done while I wait for it to dry. I thought it was a good idea to let a towel turban do some of the heavy lifting and absorb excess water to make the blow drying go faster (my hair takes forever to dry), but as it turns out, according to Sposato, I could be doing more harm than good. “Hair shrinks as it dries and having it wrapped up in a tight turban puts more stress on the hair which can lead to breakage.”
Turbie Twist (2-pack), $15, Amazon
In addition to fighting frizz (thanks, Florida!), blogger Faith Xue suggests swapping out a towel for a t-shirt. She says the texture of a towel can be overly harsh on wet hair. It can even absorb too much water which is what contributes to unwanted frizz. By using a smooth cotton t-shirt, “the water sinks into that surface and it slides through the hair instead of roughing it up.” My pro tip? Make sure to use a shirt you don’t care about because you might stain it. My hair did feel significantly wetter than normal, but on the plus side, it didn’t seem as frizzy after blow drying.

4. Conditioner + Pool = ?

Like most people with colored or treated hair, a chlorinated pool isn’t exactly my BFF. For years, I’ve avoided the salty ocean and chemical waters of pools for fear of damaging my already fragile hair. Living in Florida, though, it’s nearly impossible for me to avoid water activities and my hair has paid for it. I found a possible solution for enjoying the pool and stay protected: a little pre-rinse and a little conditioner.
The remedy required I rinse a little prior to swimming. “This will reduce chlorine absorption and the risk of any damage.” Next, I’d work some conditioner in, since oil and water don’t mix. Hypothetically, this would create a barrier between the chemical water of the pool and my colored hair. I thought, what the hell!, and gave it a whirl.
After a quick post-pool rinse and dry, my hair surprisingly didn’t feel as raw as it normally does. The outcome left it a bit flat, though. And even though I don’t see myself making water activities a regular habit, it’s nice to know I have this option now.

5. Going Natural

This one may seem like a no-brainer, but my expert hairstylist, friends, and even the internet suggested ditching the blow dryer and just going with the flow. In addition to preserving color, I also wanted to undo the damage years of bleaching and coloring had caused. I tend to do whatever I can to dry my hair as quickly as possible. For me, it means using a high-heat, full-power blow dryer. Would just letting it air dry do the trick?
After wringing out as much water as I could in the shower, I gently squeezed the ends with a t-shirt, but that was it. No serums, no heat, no sprays -- I just let nature do its thing. I definitely suggest doing this during the day because you don’t want to stain your bed with a wet head. I noticed I had to be very conscious not to lean back too much on my furniture because I didn’t want the color to get on my clothes or upholstery. Aside from practicing good posture, my hair was way softer after letting it air dry! I may not always have the time to do this one, but it had the best results by far.

Was I A DIY Hair-Treatment Convert?
In the end, I discovered I don’t have to fully rely on professional salons for achieving some things. Obviously I’ll leave the big stuff — coloring, cutting, bleaching, etc. — to the experts. But now if I feel like my hair is getting a little thirsty or needs a break from styling, I’ll do a little olive oil treatment and let it air dry. Things like putting conditioner in prior to going into the pool seems a bit impractical in retrospect because it left me feeling a bit slimy in the water, so I’ll probably bypass those entirely.
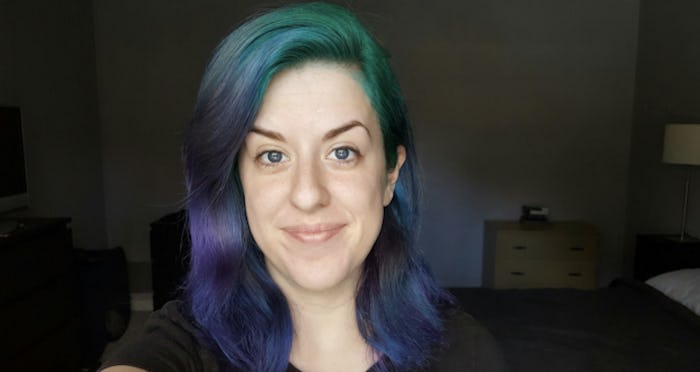
Images Courtesy of Sarah Bunton (10)
