Claws Out
These Semi-Cured Gel Nails Might Change Your Life
For all those who love nail art, but aren’t the best at doing it themselves.
I absolutely love manicures but have a hard time justifying the expense. I’ve learned how to give myself a straightforward (and if I do say so, kickass) mani at home, but with two young children running around and a newfound enthusiasm for gardening, they just don’t last. And carving out the time to sit still long enough to let my nails fully dry before attempting to do something very carefully often feels like an insurmountable task. Gel manis are a great, albeit more expensive, option — until you have to get them professionally removed, or go against the rules and peel them off yourself, only to realize how said manicure demolished your natural nails.
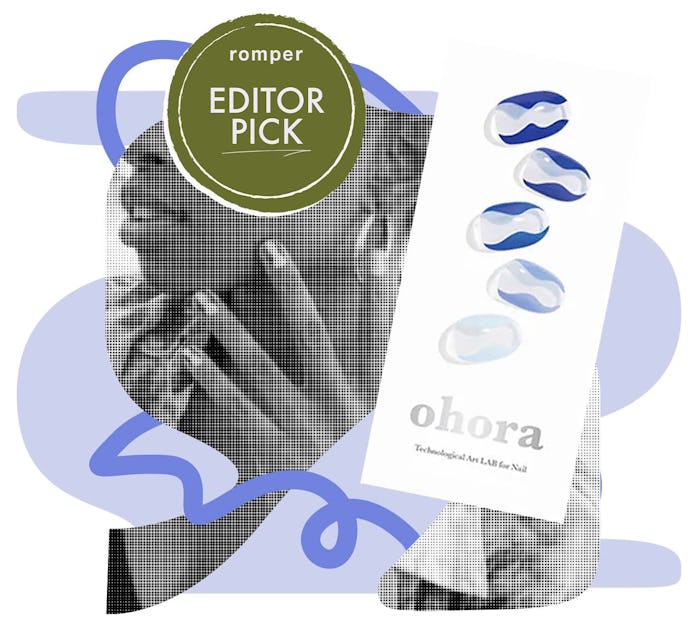
I have found a happy medium: Ohora semi-cured gel manicure nail stickers. They let you achieve the look of a glossy, professionally done gel manicure at home at a fraction of the cost and time.
As much as I try not to succumb to Instagram ads — stop knowing too much about me! — I couldn’t resist these. I was both fascinated by the process and really into the designs. Over the years I’ve tried a handful of different brands’ semi-cured gel strips. Most of them are pretty similar and straightforward, but the quality and design offerings from each are not all the same. Ohora stands out for their designs, ranging from classic and sophisticated to cute and graphic (just my speed), and the stickers are a little thicker than competitors’, which results in a stronger nail.

Stats
- Price: Ranges from $13 for solids up to $21 for pedicure styles, but they frequently run sales on individual styles and offer deals if you buy in bulk.
- Sizes: Each box includes a wide assortment to accommodate various nail bed sizes.
- Who it’s for: Everyone looking for cool, chic, classic, cute, and bejeweled designs (for hands and feet!) for nails that are not extremely long.
- When to use: Everyday use or special occasions
- Pro-tip: Add a layer or two of clear topcoat for an extra glossy finish, and don’t forget that you need a UV lamp.
What are semi-cured gel nails?
Semi-cured gel nails are basically nail stickers made of gel polish that are partly dry (about 60%). They are firm enough to retain their shape and won’t get messed up when touched, but flexible enough to wrap around a nail bed and even stretch to reach the edges of a nail if they are slightly on the smaller side. Conversely, they can be trimmed with a pair of scissors if they’re a bit long. They basically just feel like a slightly puffy sticker until you cure them and they harden. They’re generally advertised to last two weeks. They come in tons of colors and styles: solids, graphic patterns, glitter or metallic finishes, and some even have dramatic 3D elements like jewels and pearls.
Users should know that like gel nails, they require exposure under a UV lamp to fully cure. Ohora and several similar companies all sell compact UV lamps, usually for about $20. They do have a promotion currently for first-time customers: you can get a free lamp with your order.
Other than the UV lamp, each box of nail strips includes everything else you need:
- 2 sheets of stickers (30 stickers total in 10 different sizes)
- 2 nail prep pads
- 1 mini nail file
- 1 wooden stick

How to apply semi-cured gel nails
Ohora has detailed tutorials on how to apply and remove semi-cured gel nails on their site, but here are the instructions in a nutshell:
- Prep your nails: file them to the shape you desire, clean up your cuticles, and give them a quick buff to help even out the surface. I’ve used these on nails that weren’t the smoothest, and they still looked great in the end, but it can’t hurt to even them out a little if they are feeling lumpier than you like.
- Use the prep pad (basically an alcohol pad) to prep your nails. You want them as clean and dust-free as possible.
- For each nail, select the appropriate size (trim or stretch as needed), press them to your nail bed, and trim or file away any overhang. Use the flat side of the slanted edge of the wooden stick to really press the edges of each decal to your nail.
- Expose them under a UV light for at least 45 seconds for simple, standard designs, and at least 60 seconds for thicker designs.
- Optional: Give it a top coat for extra shine. Ohora sells one, but I’m still going through my go-to at home. Perhaps I’ll give the Ohora brand a spin when I run out.
- When you’re ready to remove, you can slowly peel the semi-cured gel nails by using the wooden stick soaked in acetone or polish remover.

The results
It’s definitely possible to get the look of a professional gel manicure using semi-cured gel strips. I found that the one step you don’t want to shirk on is making sure the nail decal is completely flush with your nail — use that wooden stick to really make sure it’s sealed along the edges. This is because as the nail cures and hardens under the light, any spots that are not fully flush with your nails might lift away from your nail bed, leaving a small window for things to get in and loosen the nail sooner rather than later. In the event that a nail pops off before you’re ready for it to, you could probably go back to your kit and find a nail sticker to replace it, or you can glue it back on with press-on glue. (Guilty.)
And as long as you’re not putting your nails through a ton of wear and tear, like home improvement projects (also guilty), they can definitely last two weeks, possibly more. I even try to wear gloves when washing the dishes to make my gel nails go the extra mile.
Pros & cons
Pros:
- They’re way cheaper than getting a mani at the salon.
- They’re an easy way to achieve graphic nail designs.
- They last longer than a standard manicure.
- You can get a glitter manicure without having to remove glitter polish.
Cons:
- As with any manicure, they won’t last as long if you put them through a lot of wear and tear.
- There is some potential for user error (like not adhering the sticker to your nail completely or not fully curing the nail).
- Repeated UV light exposure isn’t good for your skin, so you’ll want to swipe on some suncreen before putting your hands under the lamp.
The final verdict
I don’t have the patience or artistic skill to pull off bold, graphic nail designs — at least on my right hand — but I do love them. Even when I want to go with a solid (a super glossy ballerina pink or snow white are my go-tos), I find the prep work for traditional manicures so tedious. If they’re not completely smooth, I notice every inconsistency in my nail bed. I find semi-cured gel nails super easy to use, a great deal for what they are, and way more natural-looking than press-on nails.
The TL;DR
I’m stocking up during their next big sale.
Had To Share highlights the products and finds that Romper editors and contributors love so much, we just had to share in the group chat.
This article was originally published on
